
How to add custom properties to Product page on Shopify

As we all know, Shopify allows merchants to create maximum 3 product variant options, such as Size, Color or Materials. If you want to collect more information on your Product page, Shopify has a wonderful feature called Line Item Properties.
These properties you can display with any form format like input text, textarea or select dropdown. These data will be added to cart belong with product data and appear in orders data too. In this tutorial, I will show you how simple to add this type of data in Shopify Theme.
How to add custom properties to Product page on Shopify
1. Generate property code
You can use the Shopify UI Elements Generator tool to easily generate the HTML and Liquid code for each form field that you want to add to your product page. You can add as many custom form fields to your cart form as you need.
Moreover, this tool was created by Shopify to help simplify the process of adding custom user interface elements, such as form fields and icons, to Shopify themes.
- Access Shopify UI Elements Generator
- In the Set your form field section, select the type of form element that you want to use from the Type of form field drop-down menu.
- Fill-in your custom field
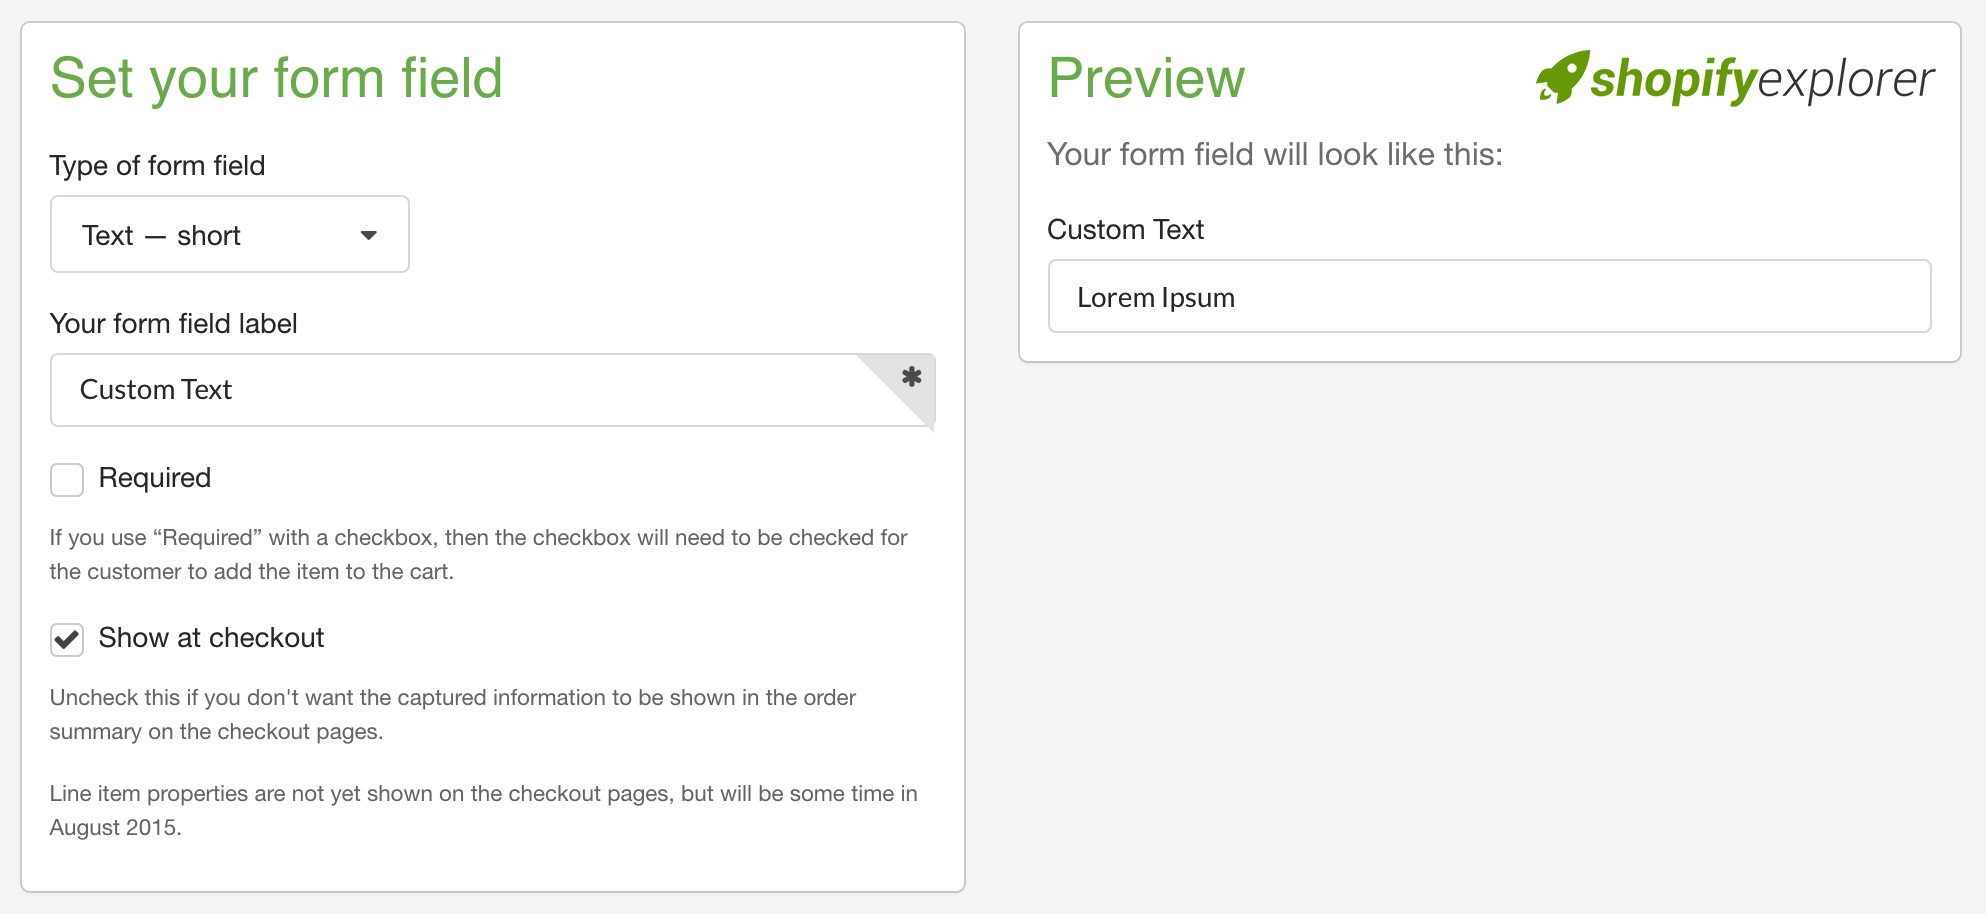
- If you want your theme to prevent customers from adding a product to the cart before they have filled in your form field, check Required.
- Copy the generated code from the box in the Grab your code section by hitting to COPY TO CLIPBOARD:

2. Display custom form fields to your product page
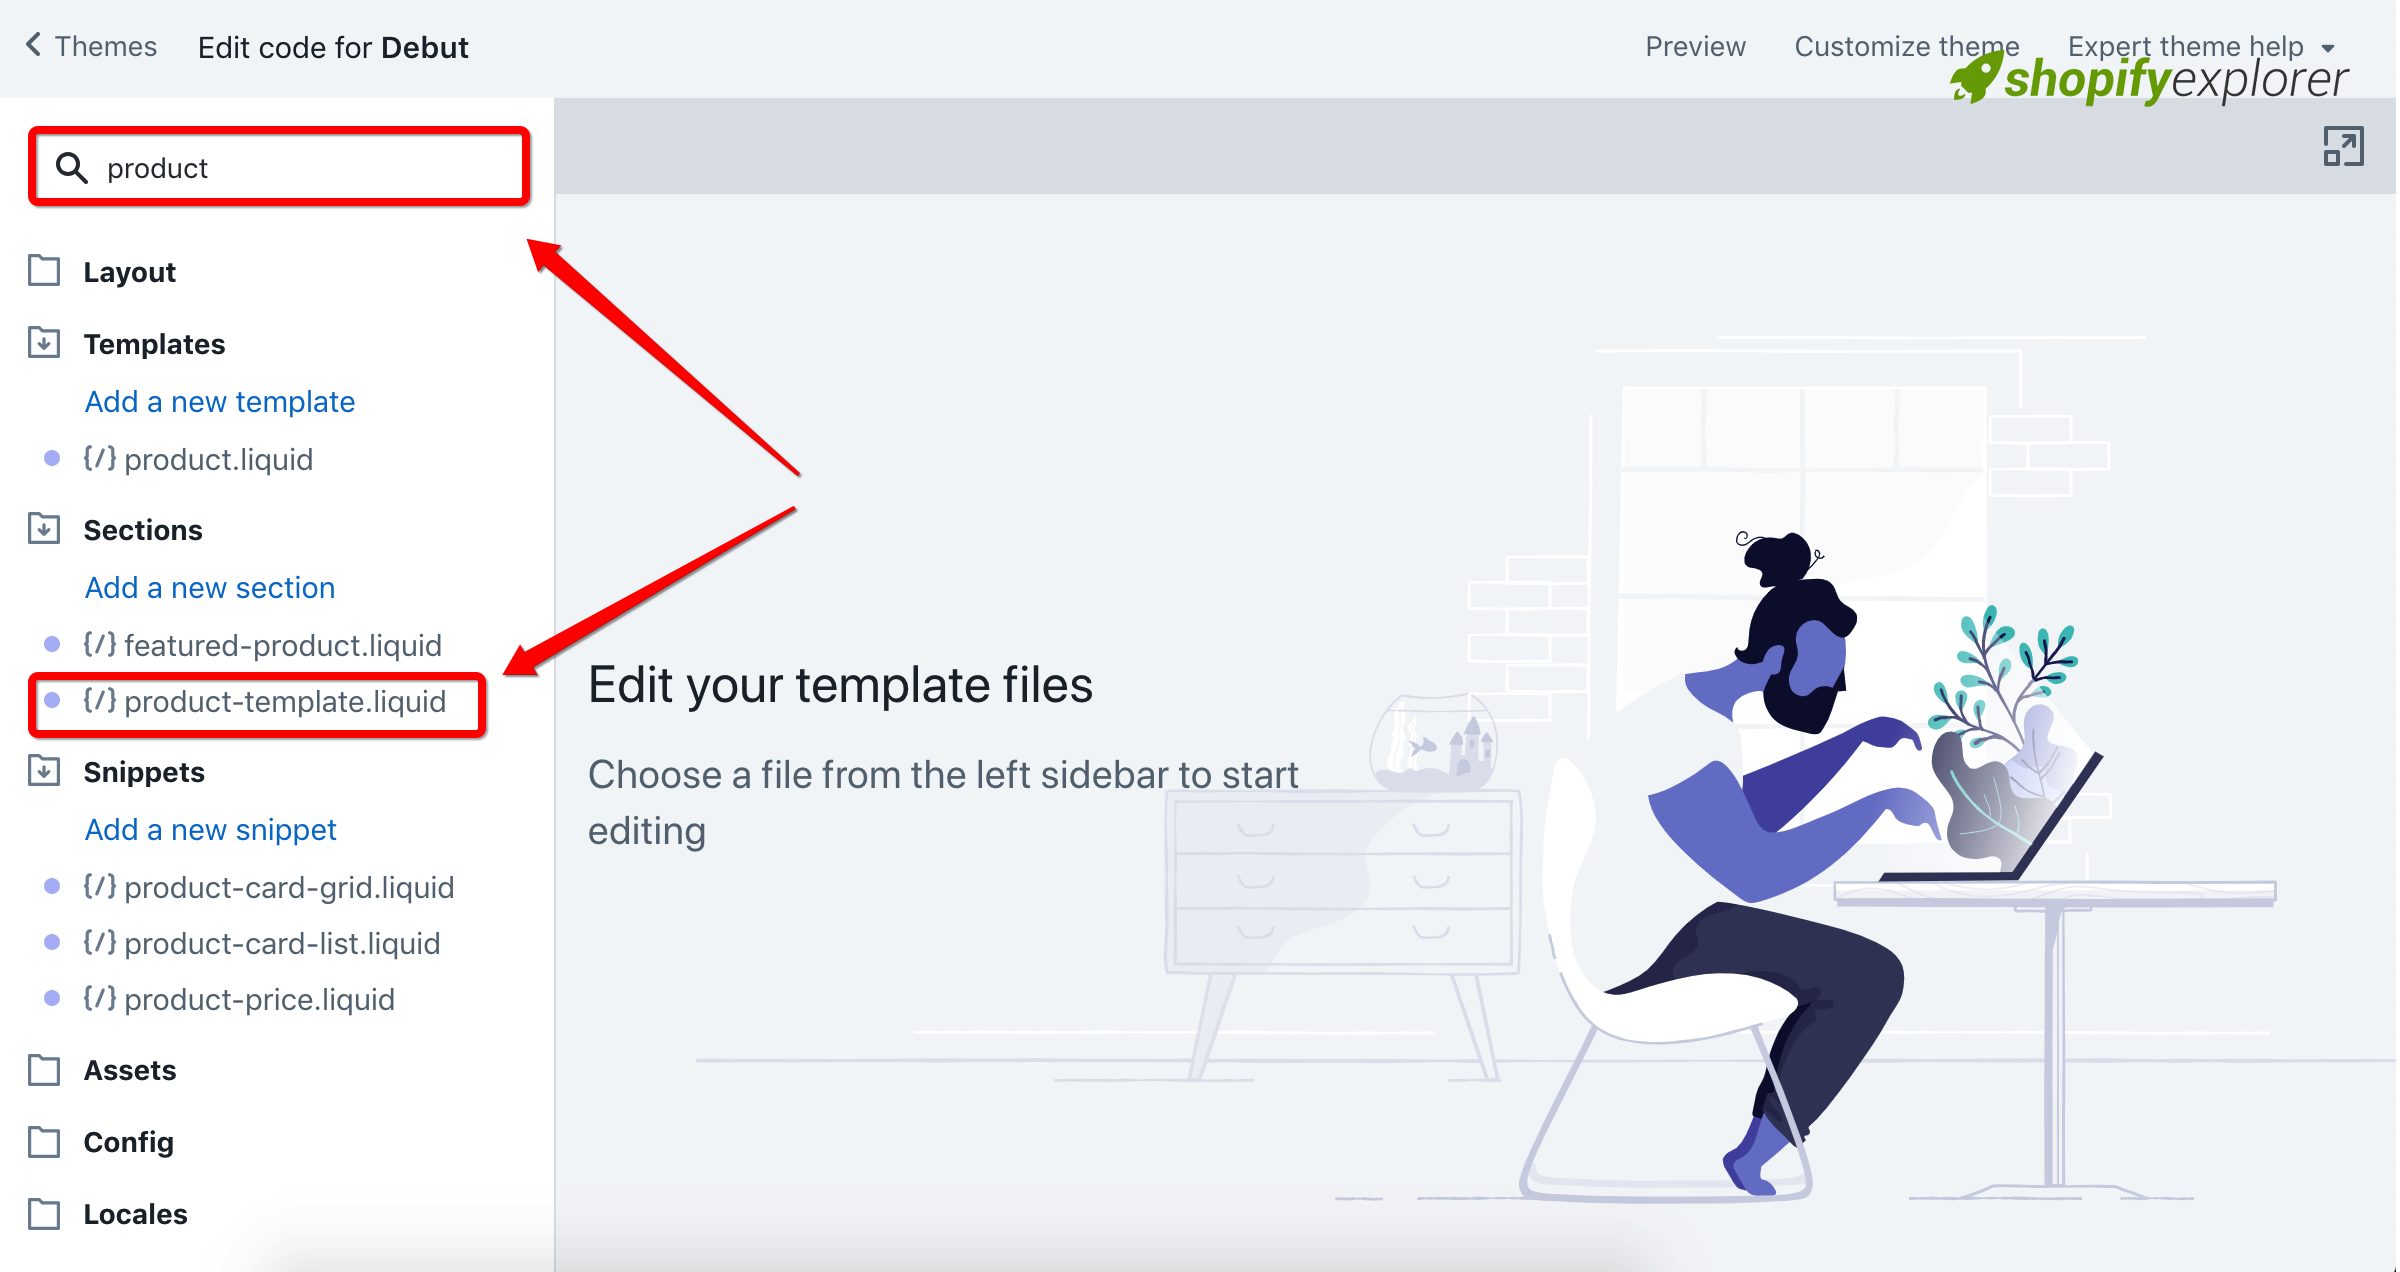
Step 1: Find your product template
- From Shopify Dashboard, navigate to your Theme editor

In the Sections directory, click choose any product template you want to add. In my case, it is default product-template.liquid
Step 2: Add custom code
Find the code type=”submit” in the file (Hit Cmd+F or Ctrl+F on window). This is part of the code for the Add to cart button. On a new line above the block of code that contains the Add to cart button, paste the form fields for your product customization. You might need to do some css customize for best match with your design.
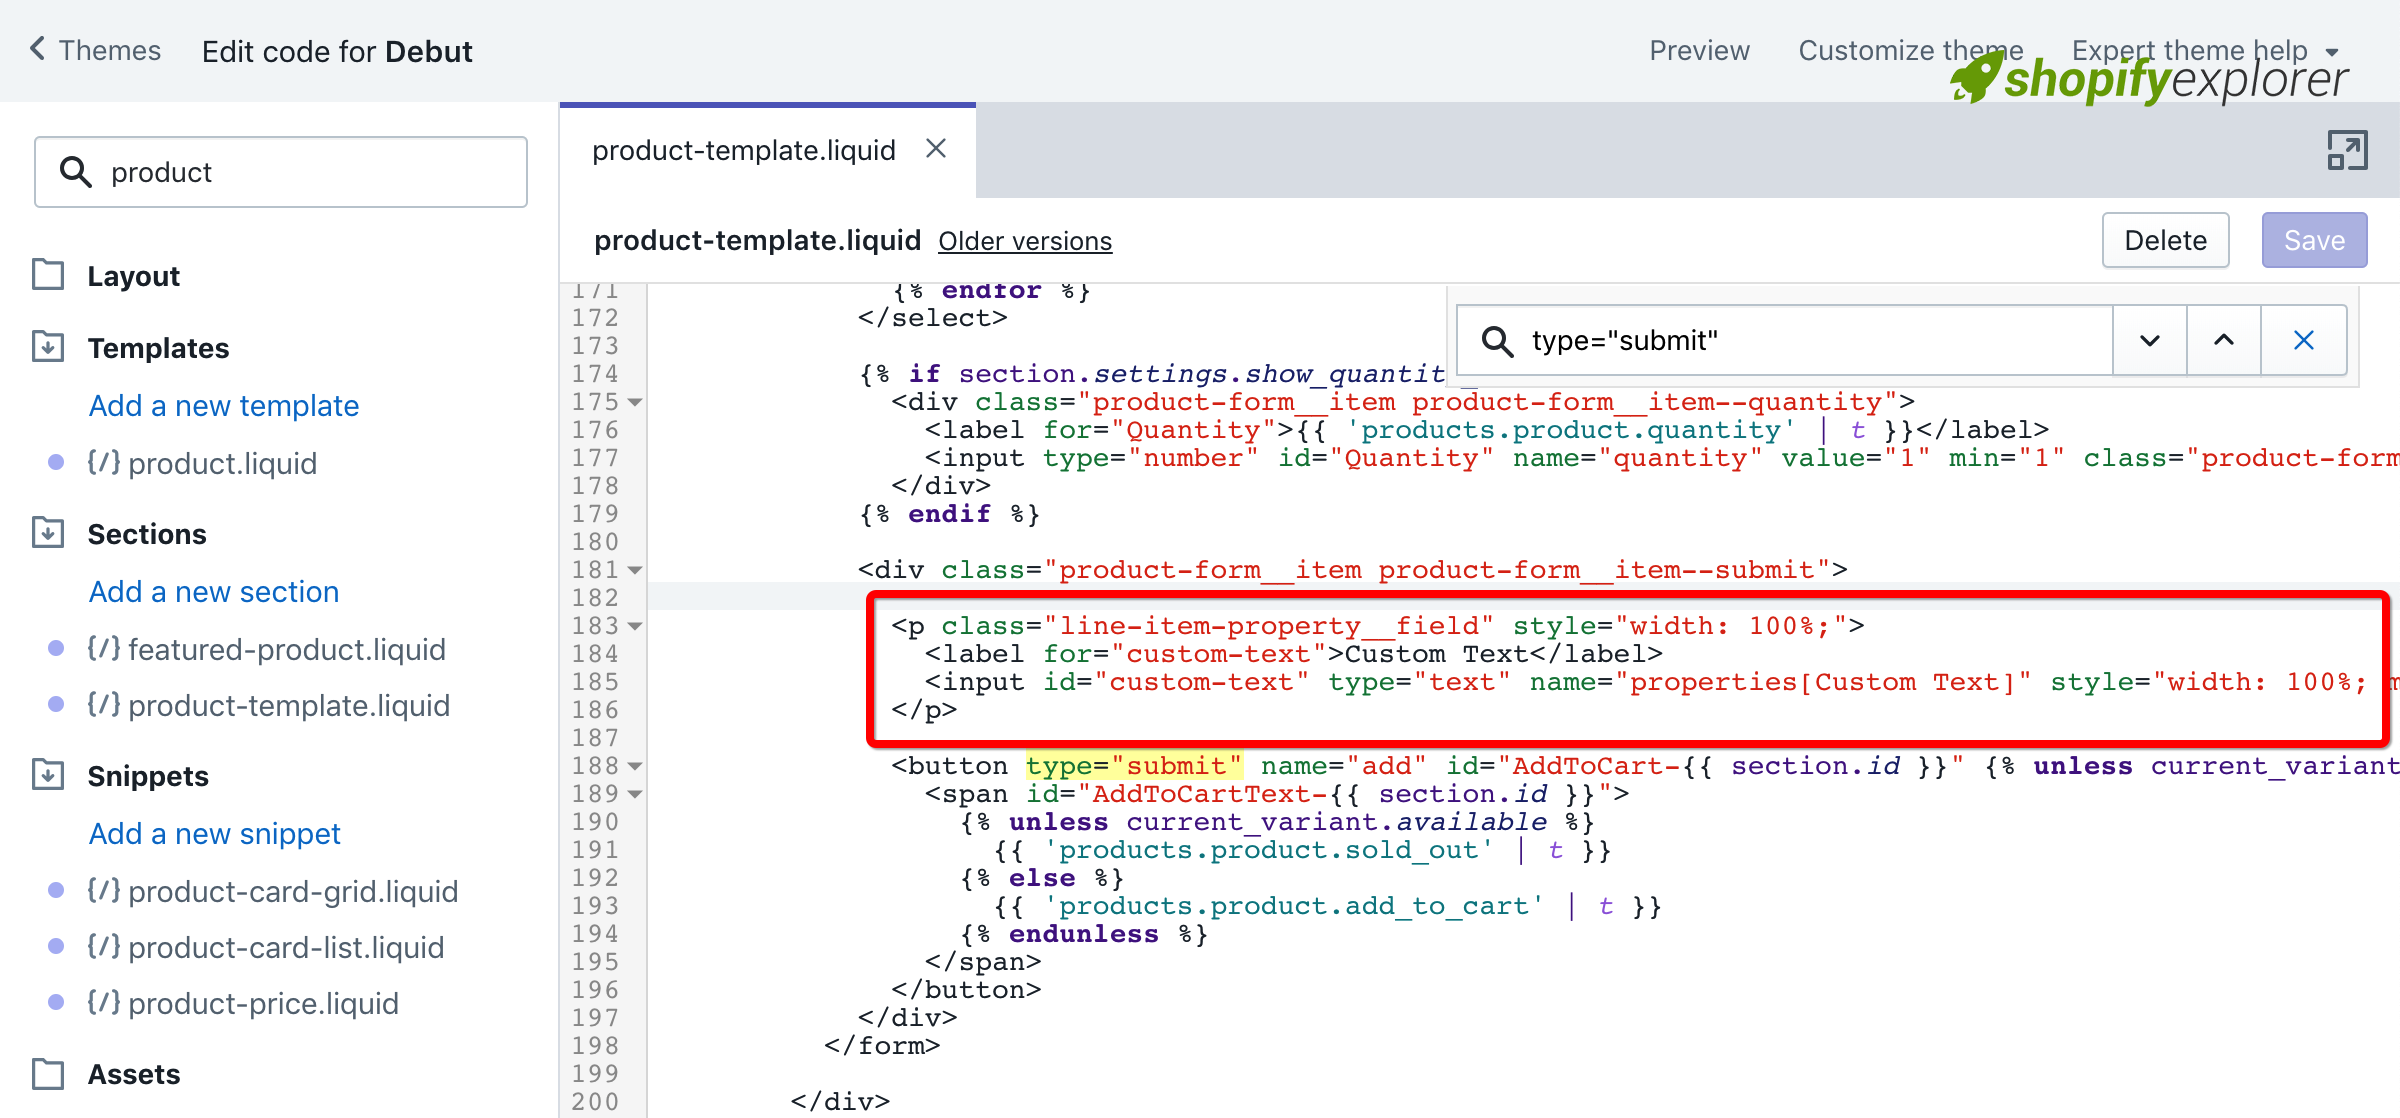
Hit Save and that all what you need to do
Conclusion:
That’s all, you can see my live theme example here. Hope that my detail tut can help you a little in launching your shop. Please fell free to contact me if you have any issue in trying this.
Thank you all for reading my tutorial. If you like it, share it to your friends and don’t forget to help me a bit by clicking ads or donate to helps me maintain this site.